Like A Virgin

SEASON 3 IS HERE!!!  After a long wait we finally have no time to play any Guild Ball due to the holidays and family obligations…

But that is okay because finally I CAN PLAY ALCHEMISTS AGAIN!!!

I have been on hiatus since GenCon, the magical event where if you catch the right person at just the right blood alcohol level, you get spoilers.  After sneaking a glimpse on new Midas there, I had no interest in playing old Midas again, so I packed up my Alchemist team for a bit.

With the release of Season 3, I would say that outside of the Engineers, Alchemists have had some of the more significant changes and I have to say, I LIKE IT.

I will not bore you with details of all the changes.  There is a lot of that out there already.  What I will talk about today  is the Midas list I have been able to play a few games with up to this and why it feels that he has touched me for the very first time.


The Team

So As you can see, the team contains 3 of the most changed characters in the game so let me run down the roster real quickly.

MIDAS-  I feel the changes to him are great.  As much as I liked the old Midas, I often found that one side of the match as not having a good time depending on how True Replication went off.  It was also hard to build a plan around such a random ability.

This Midas basically just wants to be front and center so that everyone can see him get down with his bad self.  He throws a lot more support to the team, but can be a super solo if needed to.  He’s always going to be a threat, but you won’t necessarily lose if he is taken out.

FLASK- No significant changes. See new plot card Sic ’em.

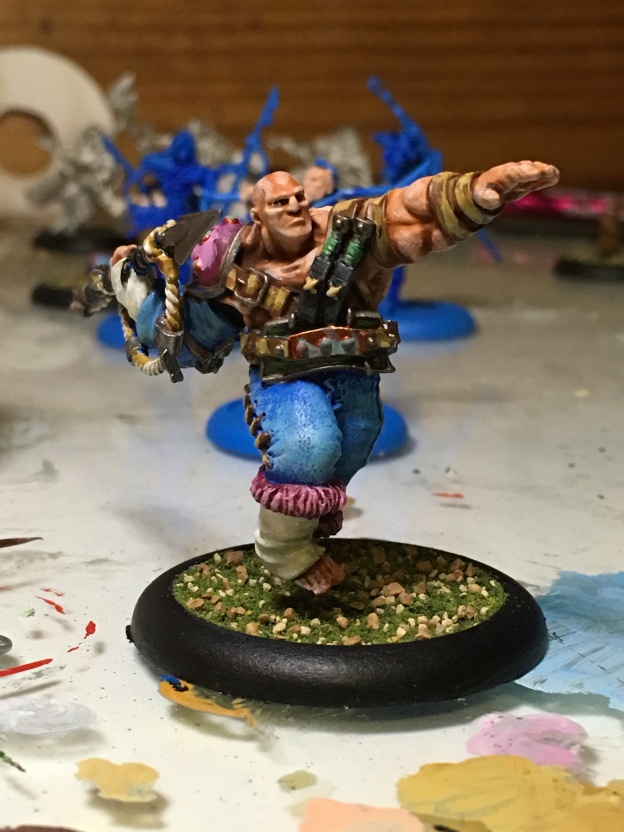
KATALYST- I was one of those rare Katalyst fans last season.  When he was hot he was supergamechanging hot, but it took a lot of set up and luck to make him shine.  This Kat is much better.  He falls into a more traditional Big Guy role of controlling the pitch with KDs and Pushes.  It is something the Alchies needed dearly.

MERCURY- He is no longer reliant on Flask at all.  Sure he could get 5 INF if needed, but he doesn’t really need it now.  He helps control the pace of the game and can be quite flexible if needed.  His 4/6 kick stat can help get that game winning Snapshot to Midas.

VITRIOL- She is one of the few nerfs in the Guild, but I am actually ok with that.  I feel her changes have refocused he as a striker and make her more disposable as a whole.  She carried a lot of the burden of primary damage dealer of the team who did require a good amount of set-up and luck to do her best work.  She lost a few points of damage dealing but has gained a few reliable KD buddies and damage dealers in Kat and Harry.

HARRY THE HAT-  Old Harry was not bad in design as much as he was greedy with high risk/reward factor.  If they would have simply upped his INF and fixed his Playbook he would have been alright.  But they game him a 2″ and a better hat, plus Mol0tov is actually worth using.  I partially expect to see him lose the 2″ in future updates.  It’s just too good considering the lack 2″ reach is a big part of a lot of the teams he works for.  But then again, the way they have formatted the Union rules on who works for who, I can also see them shuffling the pot in future seasons.

Tactics

So much of the game still revolve around Midas.  I don’t think he would have it any other way, but now he wants to help the other models help him to be awesome.  His goal, when not scoring goals, should be to be in position to score a goal when someone passes him the ball.  Everyone else should be managing threats to Midas with the thought of a 2-2 or 3-0 (goal-takeouts) game in mind.  This is important, because unlike before, where a 1-4 or even 0-6 could be an option at times, that is not really the case anymore.  This guild has definitely turned toward the footballing side of things.

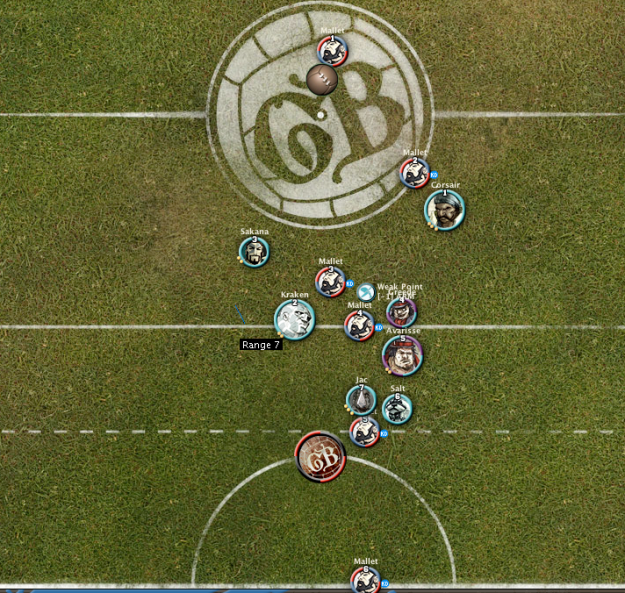
Mercury and Katalyst are the centerfielders here.  They want to be in the thick of things with their control abilities.

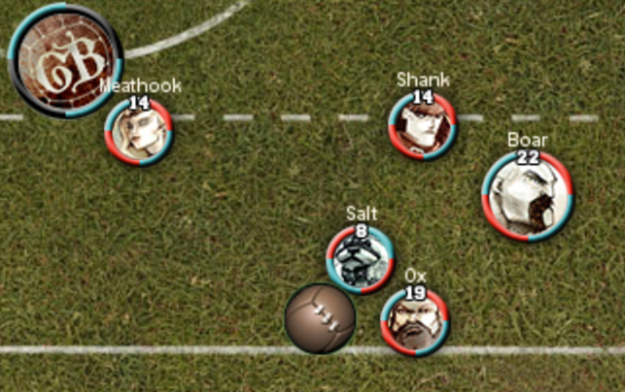
Vitriol and Harry play the flanks. (Wingback)  They can each take one, but they also work well together.  I have actually developed a role for Harry I call Animal Control.  His goal here is to Goad a Bear or Boar into chasing him through fire to the edge of the board where hopefully he can push them off.  Thats the best case scenario.  Worst case scenario, he pulls them away from  the main scrum and generates a few MPs as he dies.

Flask tries to stay within 4″ of Midas.  See new plot card Sic ’em

Early game

If you recieve the ball- Pass it around.  Try no to let opponent generate MP.  End with Midas scoring a goal and in position to activate first and score again next turn.

If you kick-  I generally do so with Vitriol.  Move her into cover to increase her threat and chill until needed.  This is where Midas can really cash in on Lure of Gold by running forward and using it on Katalyst so you can potentially get a double alpha from Vit and Kat.  With that you can hopefully generate enough momentum to contest the turn 2 roll.

Harry  should move a bit aggressively if possible to get within 6″ (8″ w/Good Marker) to Goad your Animal next turn.

Mid game

Try to maintain Midas at Snapshot range so goal threat is always there.  Use Snare and Fire to control opponent.  Try to pick out at least one target to take out with other models. Your goal is to reach 2-1 at this point so that you can focus on one more goal or takeout to win.  Ignore mascots if you can.  Don’t be afraid to let opponent score goals if you are ahead.

Late game

Hopefully this like only turn 3.  Alchemists should play fast.  If you reached 2-1 then you have options.  Goals should always be options, but the whole team ganging up should be able to take out anyone too.

Sic ‘Em

Seriously, you want this card.  But if you get it, be patient.  Take your time to set it up.  Gang Up, Knock Down, and apply Burden Token.  I wad a Flask do 12 points on intensify damage on 0 INF  Although Momentum was low all turn it won me the initiative by far.   It will not always pay off, but the dream is real.

That’s about my limit of bourbon for the night.  I could keep going,but it will make little sense.  I hope you found something here useful or informative.  Hopefully as I get more experience I will had more input.  I can maybe talk about Smoke again too once I get Vet Kat.

Fun Formats

Following on the heels of my last article about all star games I wanted to take a bit of time and discuss Fun Formats in Guild Ball.

If you come from a Warmachine background you know that conventions are usually full of fun, casual play formats for those who want a less competitive edge their playing experience for the weekend.  In general these revolve around 1 of 2 things; alternate scenario rules or alternate army/team composition rules.

I would like to qualify this entire article b stating that all of this is in pure dojo mode right now.  If anyone wishes to play test these formats and leave feedback or opinions please feel free.  Unfortunately, the only thing Jason is usually down for that is “fun” or “weird” is Naked Nun Wrestling and the rest of our immediate meta is still pretty fresh in the foot to try out odd games.  But a few of the guys are coming along nicely and may be up for experimenting in my alternative lifestyle choices soon.

So please try these out and hit me up here, on Facebook, or the Forums with feedback or ideas.

Alternate Scenarios

The interesting thing about Guild Ball is that it is balanced around one scenario, the ball, two goals, and lots of fists. So changing things up could prove to be difficult as it may really shift the balance of the game between teams.  If you take away goals or takeouts as a victory condition you need to be careful to consider how this may unbalance things.

Capture the Flag-  This is an idea that we have tossed around a bit based on the popular scenario that you see throughout a variety of games.  The objective retrieve the Flag (ball) from your opponents territory and get it to your own goal.  In this scenario it would be a one score victory with the only way to win being to capture the flag.  Takeouts could still give the edge in the game but do not result in VPs.  The biggest issue I see is how do you deal with the issues of the Flag fairly.

Obviously the Flag functions just like a ball in regular gameplay and there are 2 on the pitch.  Each team starts in possession of their own Flag which must remain between the goal line and the center line while in their possession.

-Potential issues- To avoid “dropping it in the corner” maybe there could be a rule that state that at the beginning of the Round any ball not in possession of a model will scatter d6 inches using standard scatter.

If the takeout game is nerfed to hard maybe have take-outs earn extra influence like goals.

If certain teams can score to quickly, maybe up the difficulty to score from distance by requiring more hits or higher TNs for every 4″ out.

One model cannot possess 2 balls.  If passed/snap one they automatically drop the other.  If the pass misses, both balls standard scatter.

One Goal- Placing one goal for both teams to share in the center of the field.  It would be a fast game at least.

Multiple Balls- Play a standard game but increase the balls on the pitch.  Follow possession rues above.

4-Way Game-  This is more complex than I have really thought about but you would probably need to do something like corner deployment and repositioned goal with maybe reduced team sizes.  I would advise to having each team only be able to score on a specific goal.

Alternate Composition 

These actually interest me a lot more because you get to live out crazy combos that you don’t always get.

Who’s the Boss- Ripped straight out of a Warmachine favorite.  Each player Builds a normal team without a captain.  One could allow benched models, but I may suggest not.  Between each game players are randomly generated a captain (not one that would already work for them) who is considered friendly guild.

Guild Draft-  I have been waiting on the new Mascots for this one.  In a Guild Draft both teams are playing the same team but only one of each player may be used.  Shuffle the cards and deal them out evenly.  Each player then selects a player and then swaps hands until the teams are full.  This would be an interesting way to see how models may be valued within a guild.  Picking captains first may not always be the right move.

This works great for one off games, but if you wanted to run an event you would just designate each table a guild.  The hardest part would be getting all the models, especially Union.

League Draft-  In this format you get one of each model in the game and deal them out to everyone playing.  Hands circle the group until everyone has a team (this would probably work best as an 8 man scramble-type event).  Players may only build a 6 man team, but may swap card on the extra rotations.  If a player is missing a Mascot/Captain at the end of the draft the get one randomly replacing a random player on their team

As an added bonus, the winner of each round may force a player swap.  Trading one of their models for an opponents.

Big Guy Draft-  This is a fun one off game I have been dreaming about where you draft all the 4omm based models with an opponent.  It just sounds like fun. 🙂

ENJOY!!

Like I said at the beginning, try these out and give some feedback.  Maybe as a community we can develop out these and other ideas to become regular formats at larger events for those looking for the sort of game that allows an open bar.

All-Star Guild Ball

I love fun, casual events.  With info coming out for SteamCon, one event has caught my attention.  The All-Star Tournament.  What is this you ask?  6 Captains on each team!  Already, many of you write this off as a giant headache of an event.   But if you are like me, you embrace the absurdity of it all and just want to have a good time.

So let me start with a little disclaimer.  These are not events for people that need to win.  I have been fan of this sort of thing throughout my years of playing Warmahordes.  The one thing that can ruin the fun is when everyone comes with the one most broken combo out there to try and win on shear brokenness of the format. (That’s directed to all the Denny2/Goreshade1/Skarre2 players in Casterjackapolloza.)  GET CREATIVE!  Have fun.  Have a theme.  Get Stupid.

So with that in mind I wanted to start dojoing a few ideas of how one could approach this event…

Lady’s Night

How many female Captains are there?  Just enough.  And if these ladies interest you on the field, wait until you hear what is going on in the locker room…

This is actually a very well balanced squad that can do quite a bit.  Lets take a look at the pieces.

Esters- I would probably put money on Esters being one of the top picks throughout the event.  She has 2 very useful CPs. The ability to heal and remove conditions as well as multiple buffs to throw around.  She can throw down too when needed.  She is the chewy nougat center of this sweet ass candy bar.

Pin Vice- Not as solid in the center as Esters, but this is another awesome support piece for the team.  Between the two of them any member of the team can get up to +2 DMG on Playbook results and +4/+4 MOV.  Not to mention, if Pin Vice can go first and generate Momentum, you can start with a double activation and really take charge of things.  Then, of course, her LP really opens up options with the ball.

Smoke- Upon first glance, Smoke seems like a “leave at home”model for this format, but this is just not the case.  She can do quite a bit on very little INF and more than expected on a lot of INF.  Esters and Fillet have damaging AOEs that she likes a lot.  This list can actually get all 3 damaging conditions out there and Smoke can spread them to all.  She can also threaten the goal like no other with all the buffs available. 10″ of sprint plus Cloud Jumper gives her about 23”.

Honour- Of course she is all about Superior Strategy and Topping Out.  If you need the INF elsewhere though she is still a solid blocker and has a Momentous 2 (4 with buffs) in the second column. a solid choice for any list.

Scalpel-  Pissed as hell for taking second to Obulus all the time.  She is very utilitarian as a support model, but can also shred enemies on her own.  She is actually equipped to punk out Obulus if needed.  Voodoo Strings plus Tormented Anger can ruin his, or anyone else’s plans.  Second Wind for free is what Honour likes.

Filet- She is broken as shit, so obviously she will be in many lists.  She is probably worth throwing away turn 1 after you load her up with +2 DAM (+1 for CPs), +2/+2 MOV, Superior Strategy, Topping Out +1 INF, and Second Wind.  She should be good for a few VPs out the gate.

True Bromance

When the boys get together it is all about one-upmanship.  These guys are trying to see who can dish out the most pain.  If you are out of bubble gum, this is the list for you. When you are maxed out, any model in this list can potentially be at +2 TAC and +5 DMG.

Corsair- Corsair is a bit of an odd man out since he lacks any damage buffs, but he can still roll with the Bros.  He can not only help control the ball, but he can move around the enemy pretty well and help keep everyone else on their feet.

Blackheart- Commanding Aura is enough.  Misdirection can actually prove valuable in this format as well.  He will be one of the fastest models on this team and can get everyone else moving quickly with From the Shadows

Tapper- Sure, Commanding Aura does not stack, but now it can be spread out for all to use.  He can also allocate INF where it is needed mid turn and add threat ranges to others.

Ox-  Do you like DMG buffs?  Ox is the man for this job.  You should be fine without allocating him anything, just stand tall front and center.  He can also get work done if needed.

Rage- Strong beat stick on his own, but you have to love Red Fury in this list.  With a good set up he could possibly trigger Commanding Arua turn 1 then drag more models into the suck.  Then of course let’s finish things off with a free charge.

Hammer-   Since this list is likely to leave models with extra INF as they blow up enemies on 2 hits, Hammer will be a great way to make sure you get use out of all that leftover INF.  Otherwise he can go early turn and give out Hammer Time to the others so they can blow up models on one hit instead of two.

Control Freaks

This list is really built around abusing Momentous Inspiration and controlling the the flow of the game.  If executed well this could be an extremely infuriating list to play against.

Ballista-  One of the core models here with Momentous Inspiration.  He is more likely to be playing close to the center so he can support and be there with Mine Field when the enemy closes in.

Smoke-  The other half of the equation.  As stated above, she can be good for goal scoring if needed.  Fillet and Esters allow her to be fully utilized the same before as well.  She will be more mobile than Ballista to get where she is needed.

Esters- Still a staple model that is flexible.  Just be cautious that she is the only real buffer in this list so she could have a big target on her back.  She will probably work on controlling the center with Ballista and doing much of the heavy lifting if they get engaged.

Theron- Theron is the 3rd centre fielder of the team who will Use his CPs to help gimp up the other team and his tree to block LOS.  Blessing of the Sun father can help out a lot in this list.  Don’t forget that Blasted Earth is not once per turn or he can let Shark do a free tidal Surge, well worth it.

Fillet- Still a killing machine but you probably want to be a tad more careful with her.  I would think in this list she will play a support role that can get in to finish off models and get out again.  Smoke will probably follow her around and give support.

Shark-  My initial thought was Obulus here, but I feel that Shark offers something nice to the team.  Not only does he increase their chances to score, but he can really nerf down movements with Guts & Strings and Caught in a Net.  He would be most likely to run solo around the field and harass as needed.

Str8 Ballin’

This list is built with the idea of scoring lots of goals.  Of course it can do more than that, but let’s challenge ourselves to play that way and only punch people in the face when we need to.

Obulus- Let’s try not to put him in every list ok.  Here though he has a strong ball game.  He can take the ball, protect it, move around the field and even score.  With some of the buffs going on here he can be even more amazing.

Midas- With True Replication out he needs to go full on Striker.  With his self buffs on to of others available, he can get to be quite insane in the stat lines.

Shark- If you are playing for the ball, he better be involved.  With potential for a 6/10 KICK line, you may want to set him up for Snap Shots.

Corsair-  With Ball control that rivals Obulus and he is a strong center piece.  He is a chunk of muscle that can buff those around him well.

Pin Vice- With her LP she can really open up the ball play for some crazy shenanigans.  She can also buff others to get the team going or cash in a double activation if needed.

Hammer- He can keep everyone moving farther and more accurate with the ball.  When things get hairy he can help switch the game over to “what ball?”.  There may be more strikery models out there, but he does alright.

The Wrap

So these are just  ideas for how one may build for this format.  Remember that above all this is about fun and pulling off crazy shit that you can’t see elsewhere.  Realize that it is kind of hard not to be a dick in some ways, but try not to be the biggest.  If I were running this event I would actually throw out little twists on some of the rounds like “no VPs for take outs/goals this round” or “models return to play at full health.”  So don’t take yourself too seriously and enjoy.

Shooting at Goal

I have been playing and running a lot of tournaments recently and there is one rule interaction that seems to get misplayed more than any other – Shooting at Goal.  Shooting at Goal is under Kicking on page 24 of the Season 2 Rule Book (All references to page numbers in this article are from the Season 2 Rule Book).  This is a Kick action that targets the enemy goal-post called a Shot.

Lets go over how a Shot works.  We will use Egret as an example.

Shot 1

Egret is lining up to take a shot.  After she spends one influence and 1 MP to take the shot she needs to look at her Kicking Ability [KICK]

Egret

Egret has a [KICK] of 3/8″.  The first number is the base-kick attribute and is the number of dice a model generates and adds to the dice-pool when performing a Kick (p.8).  The second number is the kick-distance that a model may kick the ball-marker (p.8).  Using these stats we see that Egret will roll 3 dice trying for a TN of 4+ on any one of those die.  If she is successful she would score a goal for her team (p.24).  If she is unsuccessful she the ball would scatter from the goal (See So You Just Missed a Shot).

Now is when things get tricky:

Shot 2

Flint is going to try a Shot.

Flint

Using Flint’s [KICK] stat he would normally get 3 dice to his dice-pool and is looking at a TN of 4+, but there are some modifiers in this situation.  Flint is being engaged by Obulus.  This would lower his dice pool by [-1] (page 24 part 2 of Kicking Sequence).  Flint cannot see the goal so he would get [+1] to his TN (page 24 part 3 of Kicking Sequence).  Flint now has a dice-pool of 2 and a TN of 5+.

Where most mistakes are made:

Shot 3

Salt is the best selling model in the Guild Ball model range for a good reason.  He is an amazing goal scorer.  Just look at how he squeezed in between all those Butcher players.

Salt

Using Salt’s [KICK] stat he would normally have 1 die in his dice-pool and is looking at a TN of 4+, but there are several modifiers in this situation.  Meathook is considered an intervening model because part of her base is on the ball path between Salt and the goal-post.   Due to this, Salt would suffer [-1] to his dice-pool (p.24 part 2 of the Kicking Sequence).  Salt is also engaged by Ox ([-1] to his dice-pool), Boar ([-1] to his dice-pool), and Shank ([-1] to his dice-pool).  This gives Salt a -3 dice pool.  Lucky for Salt modifiers cannot reduce the total dice-pool to less that one [D6] (p.22).  Salt would still be able to roll 1 die looking for a TN of 4+.  He could still Bonus Time! (p.37) to add a single die to his dice-pool and roll 2 dice looking for a TN of 4+. Salt’s TN does not change with these modifiers.

There are a few things that can alter a TN on a Shot.  The first is “If the enemy goal-post is not in LOS of the kicking model then the Shot suffers a [+1] TN” (p.24).  The second is if a model has Goal Defense – “An enemy model that makes a Shot suffers [+1] TN to the Shot while this model is within [4″] of the friendly goal-post”.  This is currently only on Tenderizer (p. 96), Veteran Velocity (p.102) , and given to a model from the Season 2 Plot Card Tracking Back (p. 41).  The third thing is playing the Season 2 Plot Card Tap In – The friendly model gains [-1] TN to the Shot.

I hope this article helps!!

Tulsy


Attrishermen Ho!!!

It’s been a while since I’ve written anything, life happens.  But I am back and after two weeks of getting my con on I have quite a bit to talk about.  First let’s get to what I played last, the Attrishermen.

For those of you not familiar with the list, I have stolen it from Mat Hart after watching him play a few times at the Bourbon Cup and again at Origins.  I must say I have become a fan of this list.  It is completely miserable to play against.  The goal is actually not to score goal with Fish, but to win with takeouts.  More specifically, throwing models off the pitch.  The list I have been using consists of Corsair, Salt, Sakana, Jac, Kraken, and Fangtooth.  In this list Fangtooth has been my top goal scorer as he usually runs up one side of the pitch beating down whoever dares come near then I eventually get him the ball and say hell with it.  There is nothing better than watching a fat man dance after scoring.

I have since come to the conclusion that I would like Avarisse and Greede in there over Fangtooth since they do fit the play style better and the extra activation would help. But Fangtooth still holds a spot on the bench along with either Siren or Vet Siren.  I will have to test them both out.  I also think Tenticles will replace Salt, but then again the rodents ability to fetch the ball and play like Princess has proven valuable.

Many of the questions that I get about this list are “How do you manage to push people off the pitch?”  Once you start to understand the basics of what to look for and how to set it up,it actually works quite well.  With Avarisse in the mix I would say that you could safely have about 24″ of push in one turn.  Much of this is very specific in angle, so it can be tricky, but I will walk you though a choice set-up to help you understand.

Sticking to the plan is not always possible, but when I start a match I will try to look for an opportunity to play out like this.  If kicking off I will lead with Corsair and try to put the ball close to the line and away from models who can get it and get away.  I want Corsair to be able to start the chain.  If I receive the ball I may leave it sit there to temp them after it.  Remember that corsair can take the ball when he likes Rough Seas.  If it makes you nervous though you can be more conservative and send salt to get the ball.  with 13″ he can usually get it and get back far enough.

So my deployment will look something like his.  Corsair Moves forward and kicks.

Screen Shot 2016-06-28 at 8.34.27 PM

In the picture below I have decided to pick on Mallet, but you should reliably be able to pull this off on any 4/1 or 3/2 model or worse in stats.  I have adjusted HPs to represent order of activation and allocated INF.  The hope is that Corsair will be able to walk and Harpoon so he has one extra Inf to attack and KD.  If you feel he may need to run, You can adjust the INF allocation.  I have done this without Avarisse in the mix and Jac can operate on less as well if played smartly.

If you notice I do not pull the model all the way B2B so I can better angle him out of there by the next move.  Sakana and Kraken are pretty interchangeable depending on positioning.  Here I go first with Kraken pull Mallet on down the line then I charge Sakana in.  Kraken can also have another INF as a backup in case the model gets up or Corsair fails to do it.  Hopefully Sakana can get a successful wrap to <<>> and add Weak Point to the model. Steamroller has become a very valuable Plot for this list as he or Jac can use it either way, they both like charging.

Up next I moved Greede to help gang up.  As I was working out this demo I realized I was really pushing my range I Avarisse would have to charge.  With KD, Weak Point and 2 friends in there he should be able to wrap and push 4″ on the charge fairly reliably.  Note that by this point you should be generating a bit of momentum and hopefully have the ball in control (or at least the person with the ball in control).  It’s not a huge deal if you don’t though.  Please send Flint in to score, our fans are looking to meet him next turn.

Screen Shot 2016-06-28 at 8.26.25 PM

So finishing things off we have salt coming in to give support.  In this case I gave Jac 3, but he really could get the job done on 2 or eve 1 INF.  It is all the same and just depends on positioning.  He has a total of 7″ he can reliably move people, so if they are over the goal line he should good.  If he can get directly behind them he puts up Ramming Speed and bumps them 2 on the move ore charge.  If you charge you should get >> at this point but > is usually enough as you don’t want to push more than 3″ away so you can use Trident Tested.  The nice thing is he generates his own Momentum, so that is not an issue If he has to finish the job at the start of the next turn.

Of course the plan is likely to go south and things get crazy.  They are not called the Attrishermen because they win fast.  This list can wear on you as much as your opponent.  Especially if they have a lot of pushes and KDs as well.  We played an almost mirror match the other day.  It was miserable.

I really only have a handful of games with them under my belt at this time, but I like what I see and look forward to getting more experience.


Smoke and Mirrors

Having just finished my first actual tournament with Smoke I wanted to take some time and reflect on tactics with her and what I like about her.  I went 3-1 at  this event, My only loss was against Jason who has been my main sparring partner and after many games of Smoke beating Hunters he finally learned the value of Hemlock.  Plus my dice were crap.

The Line Up

My line up is Smoke, Flask, Calculus, Venin, Mercury, and Katalyst.  Hemlock and Vitriol are on the bench.  I swap out Hemlock for Calculus if I feel I need Smelling Salts, otherwise I prefer what Calculus can offer in her playbook and aura.  Vitriol is there if I need her over Mercury or Katalyst.  I have not felt that need yet.  In theory, She is there when you think you need more than 1 goal.

Tactics

My goal going into each game is 4 take outs 1 goal.  If I were ever able to win initiative and take the ball first turn I may say 2 goals is good, but I don’t ever get the ball and am quite unsure what to do with it if I do.  It can feel somewhat scary to play her.  You often feel like you are losing until you start dropping 2-3 enemies a turn.  I have had many games come down to who can win initiative to end the game in one activation.  Fortunately by that point you are generally up on MP.

Turn 1

I find myself being more conservative turn 1.  I normally find myself kicking off and honestly prefer it that way.  I would probably only choose to receive the ball if going against strong round 1 scorers, but even then, they will generally fall into traps you want them to.  My allocation is fairly standard.  1 INF to Venin, Flask, and Katalyst. At least 3 Inf to Calculus and Mercury so they can run and AOE.  That leave you with 5.  I generally go 3 on Smoke and then put the other 2 where they may be useful.  It is nice to put 5 on Merc if you think he will be able to Jog and use both CPs to gain 2 Mo.  Just use your best judgment.

Smoke always kicks.  Aside from having the ability to put the ball close to the line without looking like you are trying to, I like having her up more so I can activate her late and still get good positions with Calc and Merc to generate Mo off her.  If they do chose to ignore the ball first activation or cannot get it, she can usually recover it quite safely.  I have also had a fair share of balls not make it across the line.  While not optimal, you do want to lure your opponent into a sense of false confidence, so it is not the end of things.

Patience and proper reactions are important turn 1.  You need to gage what you think your opponent is going to do.  How aggressive will they get?  Are they going for more take outs or goals.  A scoring team may actually be harder to deal with as they want to spread out more.  That first model going after the ball can be really important in setting the pace of things based on who they are and where they end.

You generally want to activate either Venin or Katalyst first.  Normally they want to go later, but the goal is to position them somewhere exposed and hope your opponent takes the bait.  This can be tricky so you ant them where they will be in a strong position if your opponent does not bite.  Generally I have been leading with Kat and Flask to pass the activations.  Don’t forget to ask questions like “How far is Harpoon/Lure/Drags threat?” and then foolishly move in it.  It helps to get a strong understanding of what kind of punishment Venin and Kat can take.

As the turn evolve you are hopefully getting more than 1 model in your AOEs as you gain Mo.  Then you want to end the turn spreading and reapplying conditions.

Turn 2

You will probably lose initiative here.  If not, great. Either way, if things worked out right you should have Katalyst close enough to walk into someone and hit 3 Intensifies off the bat on models nearby that should be under conditions.  Know who your low HP models are.  Do not be afraid to kill a mascot, even if it is Loved.  Taking activations from the end of the turn is far more valuable.  Also remember that if they have played Husbandry, that’s another 2 VPs for you if you still have your LP next turn.  Smoke should be able to get to them just about anywhere.

End Game

Once you get rolling and they start dropping, you should be able to take a strong hold of the Momentum of the game.  It is important as things unfold to really keep an eye on your opponents HPs and pay attention to how they are managing their own conditions and HPs. Hold onto your LP for when it will do the best.  I will often use it to wipe out a mascot early if I can, but if I don’t I will try to gage where everyone is and when it is the best.  Remember that it can actually cause 5 damage if you go last and then move the clouds to poison.  It can lure your opponent to thinking they are safe if you use Merc and Calc for things other than AOEs.  While Chemical Shower does not directly cause poison it can still be Breezed to do so.

Finally, if the condition game is going well then your only concern with the ball should be protecting it so you can get it to Smoke to close things out.  If your opponent is playing smarter with positioning and managing conditions then you need to be a little more aggressive with the ball. Because of Unpredictable Move and Cloud Jumper I do not feel so bad having Smoke hang out in enemy territory, just be aware of who can get to her and be ready to jump and run if things get hot.  Otherwise, Merc to Smoke is not a bad Snapshot option.  So if you are playing against a heavy scoring team, get her there and let them score before activating Merc.

GBKeeper

It’s been busy lately but I really wanted to take a moment to shed a light on something getting done for and by the community.  I got to take part in the beta testing for the GBKeeper iOS app and I must say I am impressed.  It has been released to the public for a few weeks now and hopefully if you have the ability to use it.  Now my experiences with it are mostly on my iPhone.  I believe it was optimized for the iPad, but I have no complaits.

First off let’s give a big thanks to Mickey Roberson (DieselDM) for taking the time to make this wonderful app. He has done this out of the kindness of his heart because he loves this game and wanted something similar to Warroom for Guildball.  He has been a programming professional for about a decade and a gamer since he could say d20.  He does play Masons so we will have to forgive him on that.  You can check out his blog at http://www.dieseldm.com/

On to the app!  The images I am going to show you are from my iPad mini.  As I said, I generally use my iPhone. The big difference is more on the screen at once. The App basically has 3 features.  The Library, where you just look at cards.  The Teams section, where you can build a roster.  And the Play section, where you can track damage, goal, and Momentum.  Below we have the Library.

IMG_0031

Once you select your guild you will see the cards displayed as below.

IMG_0032

Moving onto the team feature you first select your guild.


IMG_0033

Once you select a guild you will build your team down below.  Rosters are not necessarily made with a bench in mind but this does not matter until you go to the play screen.  So you can make your list whatever size you like until you go to the play screen.

IMG_0035

I think the best thing about the team building section is this is where you can actually flip through all the cards the quickest.  Once you enter the “info” button you can swipe between cards with ease.  Because of that I seldom go to the Library if I want to look through a whole team for some dojo.

IMG_0034

Another great feature is the ability to share.  In Warroom, you always had to “mail” then copy from there.  I love that you can easily send a list in a message or even just copy it directly from the app.

IMG_0036

In Play you get a screen like this.  It tracks VPs, Goals, Momentum, and Damage.  The only complaints I have is that you can adjust damage on a card you are not looking at.  I have found myself marking the wrong card a few times.  This feature was discussed in Beta and others like it the way it is.  Not a big deal, just something to be aware of.  Another thing is that some opponents want to see your Momentum and it can be forgetful when tracking two sets of Momentum, so as nice as the features are I generally default to tabletop tracking.

IMG_0037

It does have this nice little window that tells you how much INF you get each turn, that is very helpful when you don’t want to math.

IMG_0038

In the end I think this app is great.  It does everything you would want a game tracking app to do.  Like with most game tracking apps it takes a bit of getting use to if you want to use it as a primary tool, but I love having it around.  So far Mickey has done a great job at keeping it up to date, which is also an important feature in an app.  If you see him, make sure you tell him what a good job he does and buy him a beer.


Venin 2 Dope

Something makes me think that once we get the fluff for Venin he may be a total douche bag.  But that’s ok because he’s our douche bag.  I want to take a little time to talk about why I have grown to love this Faygo drinking fool.

Stats and Playbook

Overall he is pretty above average for the Guild.  Most models have a 5″/8″ MOV so he is actually a bit quicker on the Jog.  This is not a feature that goes unnoticed. TAC 5 is better than 4.  It took me some time to realize that his KICK was 8″.  This is actually pretty nice and allows him to threaten the goal more than one expects.  Sure his accuracy isn’t all that, but most people are not expecting 8″ outside captains or strikers, so he does actually sneak in and score from time to time. His defensive stats are on the higher end of average and his INF is pretty par for the game.

His playbook, like most Alchemists is not overly exciting. He does have a low tackle.  The sad thing is that you generally won’t to do 2 things when attacking with him, cause damage and generate Momentum.  He is not likely to do both at once.

Plays

Plays are generally where the magic happens here.

Melting Body- Free?!- Buffs ARM!?- Who cares about the poison? 4+/2 is a damn good stat. With Man Down as a plot card he can get downright unbreakable.  The only downside to this is it doesn’t do much good if you take a late activation option with him.

Sacrificial Puppet-  An odd ability that until yesterday I did not give much though to.  If he can generate Momentum with Smoke and there is a easy target around I may try this out more.  But for now I feel he is tough enough without it.

Coagulation- His signature play, making people bleed.  Trying to capitalize on getting off this play with maximum results is core to doing as a team what the Alchemists do best.  I believe that he is a player that can really pay off if you keep your eye on the prize.

Traits

Not to much to be said about these individually.  Both are about spreading poison.  Don’t forget about them and learn to exploit them.  As always, remember that auras are triggered on entering and activating within so you can have a good deal of control with pushes or just engaging people before they activate.

Activationability

Venin follows the recent trends of flexibility in models.  He can fill roles early and late in the turn.  While I prefer to see him act late turn, it is important to recognize his uses early turn as well.

Early turn- He is basically making a Sacrificial Puppet of himself (assuming he does not have ball plays to make).  In my opinion, his role more than anyone else on the team is to be front and center of the action.  Drawing in opponents to get them conditioned and within auras.  I have little fear moving him forward to block lanes to more valuable targets and use Melting Body.  Maybe Sac Pup as well.  Most will see him there with poison and assume he will be an easy target.  Generally I find he holds up better than expected.

Late turn-  This is when you want to get bleed out there. In general I would say the later the better, but if you are really behind in Momentum and see a good opportunity for Kat to go last, you may want to give your opponent a few activations to really think about spending it, especially if you can tag models that have already activated.  A good order of activation if not last may be third to last followed by Kat and Smoke to re-apply conditions and take things to pound town, either order can work depending on situation.

Final Thoughts

Overall, What I like about him is that he an do most of the above on the cheap.  I generally give him one INF so I can run into position or punch someone to generate Momentum.  He rarely NEEDS more but he can usually put it to good use if I give him more.  I feel the best way to treat Venin is like the douche we all know he is.  Smile every time he gets punched in the face. You know he deserves it.

Meet the New Boss… Smoke

Having gotten my grubby little hands on Smoke in advance to her release I have been itching to talk about her.  Now that she has been officially spoiled and I have got a few games in I am happy to announce that Smoke is legit.


Same as the old boss?

This is an interesting question.  In many ways she is a different beast. She can still play a semi-Midas game in some ways.  Even though she is slower than Midas and has a shorter kick range, she has an equal if not greater threat range to the goal with a little more reliability getting there thanks to Cloud Jumper.

She also has Unpredictable Movement, which is shared by Midas.  Like him, not having 2″ melee can make this easily countered, but it does give here a range of survivability and can prove tactically useful.  In my first game with her against Loxam, he was setting up Rage to finish off one of my other models late turn.  By making a cloud and jumping her between them, I was able to thwart that plan knowing full well she was safe.

Another advantage is that she is no where near the individual threat as Midas so she can sneak in under the radar.  Unless I really have a solid plan to try to steal the ball with her I can generally get by with 2 or less INF on her.  She spends most her time looking very unsuspecting and just doing little things to help her team along.

Stats and Playbook

These are really some of her less impressive features. I do no force her using them any more than needed.  All you need to remember for her stats are 4/6 with 1 ARM.  Her playbook is far from Midas.  She has a closer Tackle, but it is still 50% up her playbook.    I actually like the fact that she also has a Momentous Tackle, so if you need to get the ball and get away, that is an option.  Otherwise keep in mind that she pushes, not dodges.  Makes sense considering you can push models into conditions.

Plays

Smoke Bomb- seriously, you didn’t see it coming.  Nothing new to the team.  It is nice to have around.  She can give it to herself for protection or jumping, or even better, set up a target for Vitriol so she doesn’t have to use hers.  Overall, great utility.

Alchemy Mix-  So far my least used play and the one we’ve known. Make a double of an AOE and flip it.  No conditions applied instantly.   Not bad for utility.  It will probably see most use with Burning AOEs to block lanes.  I have used it to make sure I can get an AOE where needed with the next play.

Chemical Breeze-  This is without a doubt her signature play.  Move a cloud, spread conditions.  The problem with the condition game is people get rid of conditions.  Being able to reapply them mid to late turn helps keep it going.  I always have at least 1 INF on her for this.  It almost always has utility.  BOOM!!!   That was the sound of my head exploding as I JUST realized it is once per AOE not once per turn.  Things just got a lot better!

Chemical Shower- An interesting LP.  In some ways it can seem OP in others it can seem weak, but it definitely not bad.  You create 2 AOEs that auto hit for 3 Condition Damage (no Tough Hide) and leave behind Poison AOEs.  No conditions applied initially. Damage does not stack.  I find I often forget it now, but I am learning to look for the right opportunity to use it.  It would be nice if it caused multiple conditions, but, whatever.

Traits

Cloud Jumper- This would be her signature trait.  It doesn’t just increase her range, It gets her in and out of places that others cannot so easily.  Above all is the zero cost of INF or MOM.  Opponents expect to see something that good cost something so when they are eyeballing your resources it may not cross their mind as a possibility.

Momentous Inspiration-  This is not Engineers.  Only 3 models can really benefit this.  Mercury, Calculus, and Hemlock.  Sure Decimate is included, but for 3 INF I don’t count her right now.  The main thing to remember is that Smoke does not benefit from this.  You are not going to wrack up MOM from this.  It does allow for Calculus or Mercury to activate early and spread their love while generating a MOM to keep in your pocket for a rainy day.  Don’t expect greatness from this, just take what you can when you can.

Unpredictable Movement- Nothing new here.  Same ability seen throughout the game

Activationability

I don’t know that that is a word or not, but it is now.  What I am talking about is when/where she wants to activate.  The beautiful thing is there is no set time.  She is someone who can easily go anytime.

Early turn-  There are 2 times I can see that you would want to go first with her.  When you have need her to ball and when you need her to mop up after conditions.

She is obviously capable of getting places and getting the ball when she needs to.  As much as I am growing more cautious of scoring early turn, I don’t try that to much, but she does have the ability.

The main reason I would go first with her though is when she can blow shit up with her LP.  I had a game the other night against the Brewers and I kind of go to live the dream.  I wouldn’t expect this too often, but it is sweet when it can happen.

-He basically had all his team grouped in the center into 2 groups of 3 right next to each other.  Katalyst ended the turn lighting people up with Intensify after Venin Bled a bunch.  They all took hits for the most part.  Venin had the ball and could likely score first turn.  Katalyst was front and center to continue pounding, but most the people with conditions would die to quickly to make him worth going first.  Scum and Spigot had less than 3 HPs.  By activating Smoke first I could blow them up with her LP then move the clouds to poison everyone and follow up with Katalyst to lay down the pain.  By the end of the turn I killed 4 models and was able to score off the bat next turn.

Mid-turn- Board control.  Shift and double clouds to spread more conditions and set up fire traps.  This is generally when she is least productive, but can be useful based on need.  It is really a question of going when you feel it is safe and you shouldn’t hold out longer, because when you really want to go is…

Late turn-  The later in the turn you go, the less likely your opponent will be to shake effects.  The prime time is probably to activate her second to last so that you can follow up with Katalyst or Venin to do what they do best.  Going sooner probably gives them the chance to clear at least 1-2 key models.  The absolute best situation you want is Katalyst to end the turn pounding out on models with Poison and Bleed close by, win the initiative, and then continue pounding.  That is potentially 17 points to every model within 3 inches and no retaliation

What about Midas-Ball?

The interesting thing is that she can do it to.  The danger is that you don’t want to totally forsake the condition game or she becomes very one dimensional.  I would suggest Vitriol, Venin, Calculus Mist.  I think Calculus and Venin are actually her core 2 guys she always wants.  They can hold the center of the field pretty well and spread conditional love pretty reliably.  The new mascot is still yet to be seen, but it would have to be pretty sweet to replace Flasks Intensify if you do not have Katalyst around.

Final Thoughts

I don’t hate Midas, but he is a very selfish player who’s strengths can ebb and flow based on match-ups.  Smoke on the other hand is a team player who I think can get the whole team firing on all cylinders.  It is exciting to realize that you can load up Mercury, Calculus and Katalyst every turn and not feel let down.  As always I think there will be a curve as people learn to play against her.  Even though conditions are not new, she brings them at a whole new level.  I foresee many infuriated players for some time, followed by games that are far more spread out.